

Let’s Start with a Basic , What is Web Sockets ? For Anyone who is not aware what web sockets are , let me give examples of areas where they are used to better understand how important they are .
- Chat Applications
- Realtime Monitoring Application
- Realtime Collaboration Applications
These are just some of the areas I have listed there are more areas where web sockets are used. Now let’s understand what web sockets are and how they work under the hood.
How can we best describe Web Sockets ?
In a nutshell , They are Bi Duplex Connection or in layman terms Web Sockets Allows us to Creates a 2 way connection stream that can be used to by the client or server to talk to each another
The Question Which May Arise To Your Mind is that , Dhananjay , Why do we need Web Socket when we already have HTTP .We can use POST Req to Send Data . So Here I present you with some of the draw back
- HTTP is a Uni Directional Connection , Which means that the client can only send the request to the server and the server can only respond to the client.
- HTTP is a Stateless Connection , Which means that the server does not remember the state of the client and the client does not remember the state of the server.
- HTTP is a Text Based Protocol , Which means that the data is sent in the form of text.
- HTTP is a Connectionless Protocol , Which means that the connection is closed after the request is sent and the response is received.
Getting Your Hands Dirty
I believe in principle that as a developer you should never believe in black magic and should know how things work under the hood that way you better appreciate the technology and things we take for granted ( Libraries that does all the heavy lifting for us ).
For This Example I will be using C++ to write all the code . The Repo Link will be Provided at the end of this blog. Readers are free to use any other Language of their choice
So let’s start by Creating a Simple TCP Server
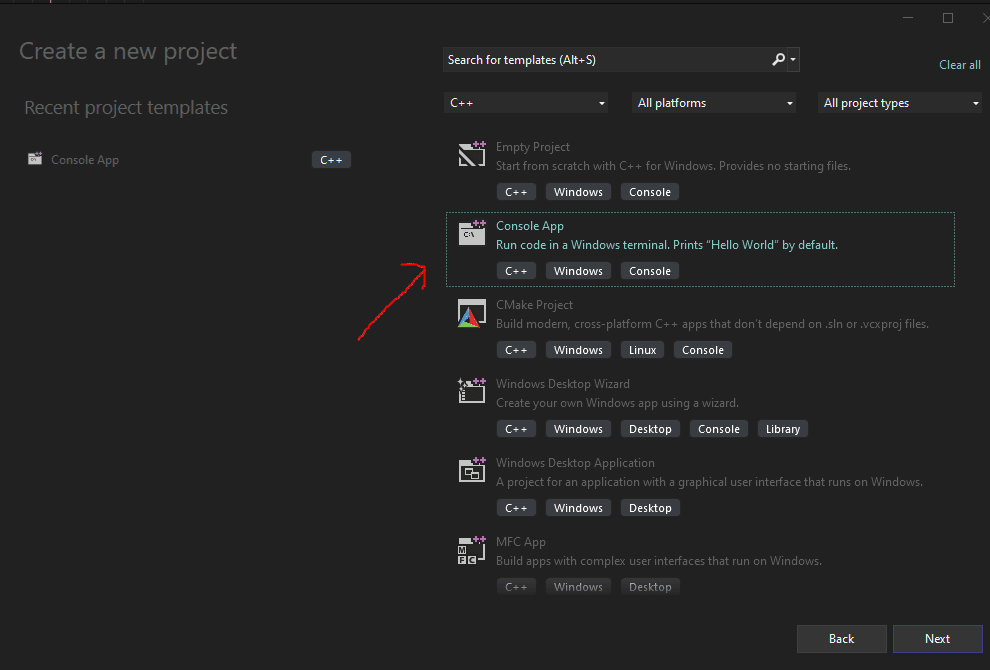
Start Visual Studio and Create a New Project with console app and hit next
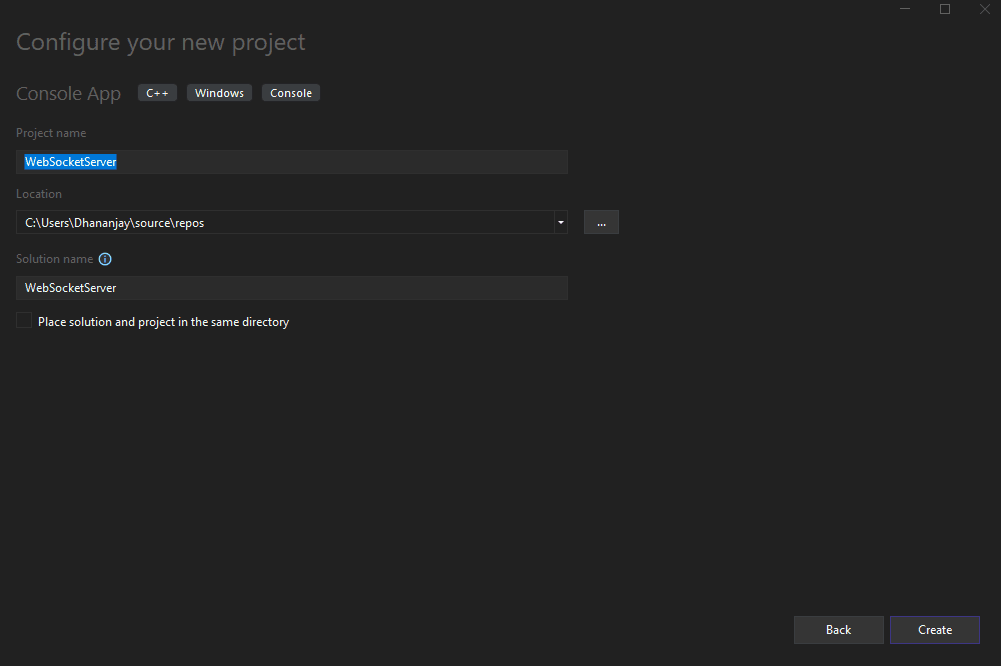
Next on Configure Screen , Keep Whatever Name You May Like , I will keep it WebSocketServer and Click Create
After Project Creation is successfull You should now see the VS Windows with a Default Template file with Default Hello World Example Click on play button to build and run project . if everything goes well you should see a program being run in terminal and hello world being printed on Screen

Add Winsock specific Headers
The First Step is to Setup a Socket which binds itself to some port , we will be using windows specific DLL to setup
To Create a socket connection we first have to import some library that are associated to Winsock Windows Sockets Programming it provides API to communicate between Windows network software and network services.
#include <iostream>
#include <winsock2.h>
#include <ws2tcpip.h>

#pragma comment(lib, "Ws2_32.lib")

int main() {
return 0;
}
winsock2 is header core functionality for Windows Sockets and ws2tcpipused in conjunction with winsock2.h that provides additional functions and structure to work with TCP connection . #pragma comment(lib, ”Ws2_32.lib”) is a compiler directive that tell compiler to dynamically link Windows Library
Initializing Winsock
All processes (applications or DLLs) that call Winsock functions must initialize the use of the Windows Sockets DLL before making other Winsock functions calls.
- Create a WSADATA object called wsaData
- Call WSAStartup and return its value as an integer and check for errors
WSADATA wsaData;
if (WSAStartup(MAKEWORD(2, 2), &wsaData) != 0) {
std::cout << "Failed to initialize Winsock";
return 1;
}
The WSAStartup function is called to initiate use of WS2_32.dll . The WSADATA structure contains information about the Windows Sockets implementation. The MAKEWORD(2,2) parameter of WSAStartup makes a request for version 2.2 of Winsock on the system, and sets the passed version as the highest version of Windows Sockets support that the caller can use.
Binding Port to TCP Server and Listening to it
Now that we have initialize the required headers , we are free to Setup Socket Descriptor
SOCKET SocketDescriptor = socket(AF_INET, SOCK_STREAM, 0);
if (SocketDescriptor == INVALID_SOCKET) {
std::cout << "Failed to create socket";
WSACleanup();
return 1;
}
we create SOCKET variable SocketDescriptor by defining socket(AF_INET, SOCK_STREAM, 0)
- AF_INET is used to specify the IPv4 address family
- SOCK_STREAM is used to specify the socket to be created here SOCK_STREAM is used for TCP
- 0 is used to speicify the protocol to be used , here 0 stands for default protocol linked to socket we are using
if SocketDescriptor is equal to Type INVALID_SOCKET we show message Failed to create socket , we can use std::cerr to output the error stream but since we are not focused on creating something production ready we will not be using any debugguing standard and will be using cout for most of work
if the Socket Creation Fails , we call WSACleanup to remove any unrelease resouce and close the server
Defining Connection Configuration
Now that we have a socket setup , we need to bind it to the network .
struct sockaddr_in ADDRESS;
ADDRESS.sin_family = AF_INET;
ADDRESS.sin_port = htons(9000);
ADDRESS.sin_addr.S_un.S_addr = INADDR_ANY;
we first creates a variable as ADDRESS of type struct sockaddr_in , This Struct is defined in Header file we included earlier
- sin_family field contains the address family, which is always AF_INET when TCP or User Datagram Protocol (UDP) is used.
- sin_port This field contains the port number.
- htons function converts a u_short from host to TCP/IP network byte order
- sin_addr.S_un.S_addr holds the information about the address we agree to accept . INADDR_ANY specifies that we are interested in listening to existing network we are part of , this resolves to 0.0.0.0
roll camera action !Bind - Listen - Accept !
Now that Socket Descriptor is Ready and Address Struture has been configured we are ready to Bind Socket to Port and andress and start accepting connection from it
if (bind(SocketDescriptor, (struct sockaddr*)&ADDRESS, sizeof(ADDRESS)) == SOCKET_ERROR) {
std::cout << "Failed to bind socket";
closesocket(SocketDescriptor);
WSACleanup();
return 1;
}

if (listen(SocketDescriptor, 1000) == SOCKET_ERROR) {
std::cout << "Failed to listen on socket";
closesocket(SocketDescriptor);
WSACleanup();
return 1;
}

while (true) {
SOCKET Accesptor = accept(SocketDescriptor, NULL, NULL);
std::thread t1(RequestInitlizer, Accesptor);
t1.detach();
}
This Seems like a too much of code , Let me Break it down into smaller pieces
The Line From 2-7 Binds the Socket to Port Defined , here PORT 9000 . Bind Takes Parameters
- socket -> The socket descriptor returned by a previous socket() call
SocketDescriptor passed in socket
- address -> The pointer to a sockaddr structure containing the name that is to be bound to socket.
ADDRESS as casted to Type (struct sockaddr*)
- address_len -> The size of address in bytes.
sizeof(ADDRESS) defines the size of struct
- If Bind Fails for any reason , we print Failed to bind socket , closesocket , perform cleanup for any initialized function and returns with a non zero error code
- socket -> The socket descriptor returned by a previous socket() call
The Line 9 to 14 , Setup a Connection Request Queue , any request comming to port will be stored here untill they are Accepted
- socket -> The Socket Descriptor as previos created
- backlog -> Defines the maximum length for the queue of pending connections
- Same as Bind if Listen Fails we show error msg , close socket , perform cleanup and exits with a non zero error code
Line 16 to 20 Accepts the connection that are in backlog as put in listen . Accept Takes Parameter
- accept -> Socket Descriptor
- address -> The Stores the Address defination of incoming connection
- length -> The Length of Address
- Since we are not interested in any of incoming network address we would be setting it as NULL
- we are storing the Descriptor into another variable names Accesptor
- We want our application to not be limited to single thread hence we create a while loop which accept any connection coming to backlog and then passing to a function named RequestInitlizer with Parameter Accesptor. This way The Thread Handles the Processing the request
Processing Request
Now That we have Request Coming let's Define the RequestInitlizer function to handle it
void RequestInitlizer(SOCKET Accesptor) {
}
- The Function Takes Accesptor of type SOCKET as parameter
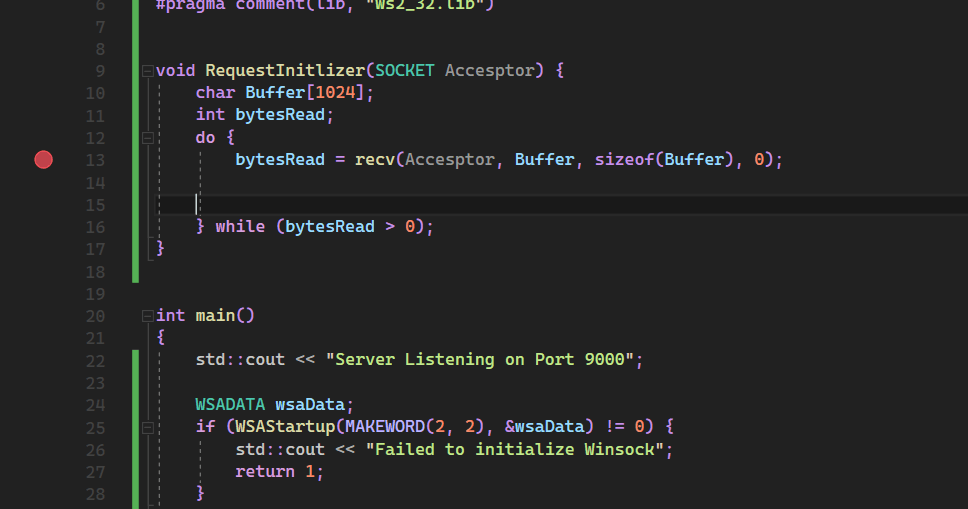
Since Network Request are streams of data , we need to read the data from the stream and then process it . We will be creating a Buffer of Size 1024 Bytes or 1 KB and storing the data from stream to it , as long as the stream is not empty
void RequestInitlizer(SOCKET Accesptor) {
char Buffer[1024];
int bytesRead;
do {
    bytesRead = recv(Accesptor, Buffer, sizeof(Buffer), 0);
    // Process the Buffer
} while (bytesRead > 0);
}
Since we have a TCP Server listening for incoming request , let's Read and examine the request coming to server . Compile and Run in Debug Mode
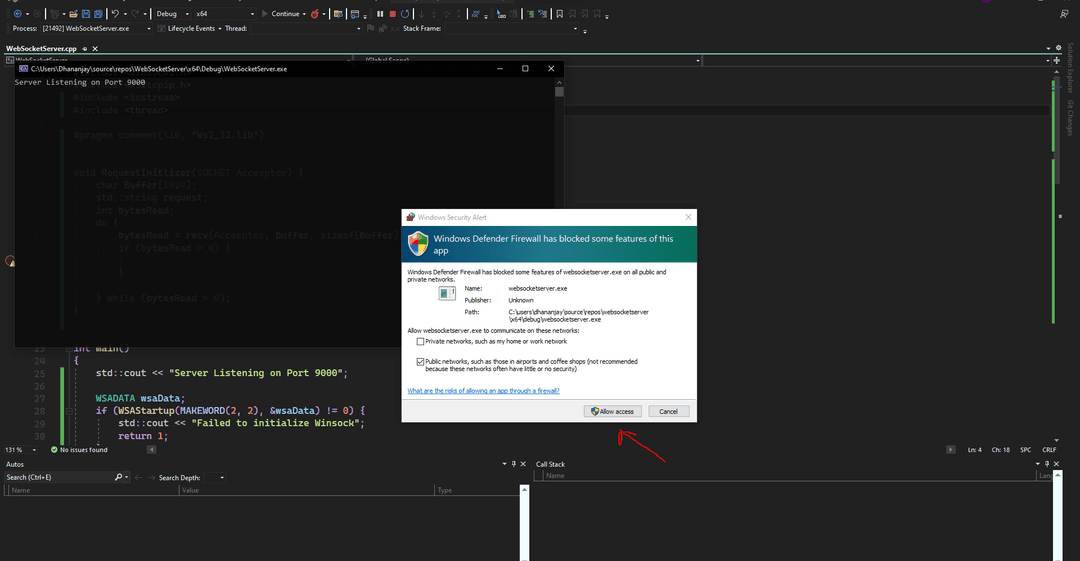
Open Any Web Socket Client Chrome Dev Tool , Postman , Insomia Client and Hit the Server IP which would be in my case ws://localhost:9000
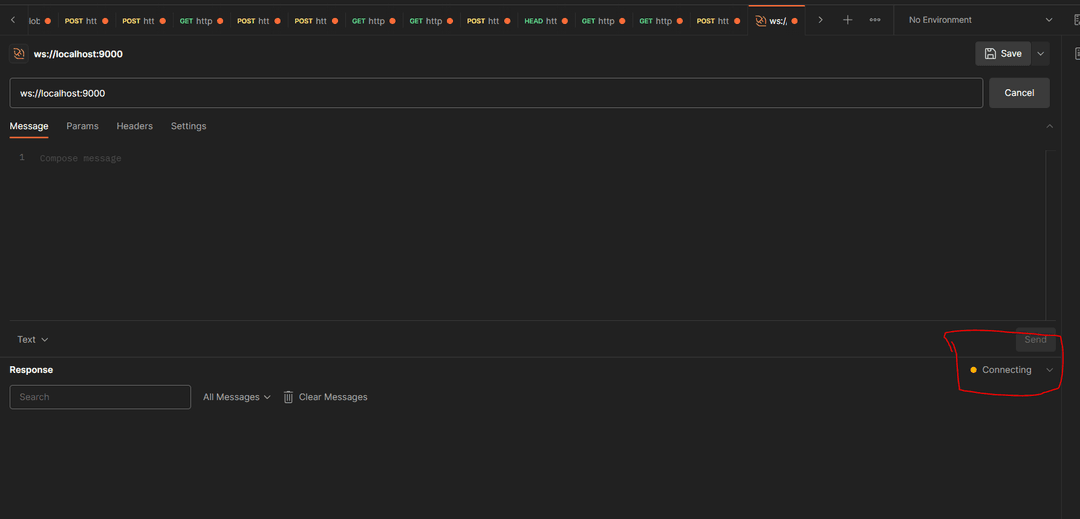

Let's Understand the Output we got
Server Listening on Port 9000
GET / HTTP/1.1
Sec-WebSocket-Version: 13
Sec-WebSocket-Key: Z4ES0uHRujEJoPyOrsseVQ==
Connection: Upgrade
Upgrade: websocket
Sec-WebSocket-Extensions: permessage-deflate; client_max_window_bits
Host: localhost:9000- The Server Sends a GET Request of HTTP Version 1.1
- Sec-WebSocket-Version -> this specifies the Web Socket Version Client is using
- Sec-WebSocket-Key -> Is an Important Aspect of our application we will talk about it later
- Connection: Upgrade -> This Directive is used to upgrade an already established connection into different protocol
- Upgrade: websocket -> Protocol we are interested in Upgrading Into
- Sec-WebSocket-Extensions -> These are some some OPTIONAL extension that are specific to client
For Client and Server to Establish WS Connection . The Server has to Send a Secret key beased on Client Request . The Key is what Client Sends with HTTP Headers
Remember the Sec-WebSocket-Key header , we will use the key to process and send back response so client and server can acknowledge each other
Let's Create a Dirty Simple Function to extract key
    void RequestInitlizer(SOCKET Accesptor) {
        char Buffer[1024];
        std::string request;
        int bytesRead;
        do {
            bytesRead = recv(Accesptor, Buffer, sizeof(Buffer), 0);
            if (bytesRead > 0) {
                request.append(Buffer, bytesRead);
                if (request.find("Sec-WebSocket-Key: ") != std::string::npos &&
                request.find("Sec-WebSocket-Version:") != std::string::npos) {
                    std::string keyHeader = "Sec-WebSocket-Key: ";
                    const char* keyStart = strstr(Buffer, keyHeader.c_str());
                    if (keyStart) {
                        keyStart += keyHeader.length();
                        const char* keyEnd = strchr(keyStart, '\r');
                        if (keyEnd) {
                            std::string key(keyStart, keyEnd);
                        }
                    }
                }
                request.clear();
            }
        } while (bytesRead > 0);
    }
Let's Breakdown Code
- List 5 and 7 are in conjuntion , The Code Reads the Buffer and store the data read into variable bytesRead
- We Instantiate a variable of type String request to store the incoming Header into string
- Strating from Line 8 we Check if bytes Read is More than 0 and then add to String Variable Request
- We use String check to find if Header contains Sec-WebSocket-Key and Sec-WebSocket-Version and compares with std::string::npos which means MATCH NOT FOUND
- From Line 12 Onwards if we store Sec-WebSocket-Key: in value keyHeader
- Line 13 strstr function is used to find the first Occurance of letter "Sec-WebSocket-Key: " as we find it we add the length of keyHeader to get the actual key we are interested in , code keyHeader.c_str converts string to char array
- keyEnd in Line 14 stores the last occurance of character space " " using strchr
- As we find The Both the Starting and End Positon we End Our Search and store it in string named key
Creating / Returning Server Key
Now that we have Client Key , we would generate a Server Key and send back to Client as Response this would be used to keep track of clients and also as per Web Socket Standard for Request Establishment
The Key Would be Sec-WebSocket-Key+ MAGIC STRINGThe Magic string is 258EAFA5-E914-47DA-95CA-C5AB0DC85B11 . We have to take SHA-1 Hash of result and return base64 encoding to this value
Since Native c++ library doesn"t comes with crypto librray , we would be using openssl library and using it"s crypto libraries Let"s Start by defining Function
#include <openssl/sha.h>
#include <openssl/bio.h>
#include <openssl/evp.h>
#include <openssl/buffer.h>

std::string base6411_encode(const unsigned char* input, int length) {
  BIO* bmem = BIO_new(BIO_s_mem());
  BIO* b64 = BIO_new(BIO_f_base64());
  b64 = BIO_push(b64, bmem);
  BIO_write(b64, input, length);
  BIO_flush(b64);
  BUF_MEM* bptr;
  BIO_get_mem_ptr(b64, &bptr);
  std::string output(bptr->data, bptr->length - 1);
  BIO_free_all(b64);
  return output;
}

std::string generateWebSocketAccept(const std::string& webSocketKey) {
  std::string guid = "258EAFA5-E914-47DA-95CA-C5AB0DC85B11";
  std::string concatenated = webSocketKey + guid;
  unsigned char digest[SHA_DIGEST_LENGTH];
  SHA1(reinterpret_cast<const unsigned char*>(concatenated.c_str()), concatenated.length(), digest);
  return base6411_encode(digest, SHA_DIGEST_LENGTH);
}
I will be explaining code aswell as crypto library and how they are implemented here . We will start with Function generateWebSocketAccept
- Line Number 20 , The Function generateWebSocketAccept takes paramter webSocketKey , guid is just the name of Magic String , On Line Number 22 we concatenated both key + Magic Number
- Line 23 , We Create a Varible Name Digest which would store SHA1 Values , we keep it length as SHA_DIGEST_LENGTH which equates to 20 , since SHA1 are of 20 values long
- Next Line , We Use SHA1 function to create SHA1 Value , reinterpret_cast is used for type conversion to const unsigned char* , The Function Takes char array of value , length of value and container that stores value of SHA1
- Now that we have SHA1 , let's create base64 out of it , BIO starts for Basic Input Output Operation which is an abstraction over openssl I/O instance , we use BIO_new(BIO_s_mem()) which creates and returns back address pointer of memory BIO
- We Create a new BIO Filter Type BIO_f_base64 that takes a Input and write back base64 as Output
- Line 10 , b64 = BIO_push(b64, bmem) returns the starting address of memory
- As we have BIO Base64 Filter Ready , we would write input to it with BIO_write , it takes address , input and length
- BIO_flush tells the writer that there"s no more data coming
- we create and store Buffer to a pointer bptr using BIO_get_mem_ptr
- Line 15 , we write the Output to string variable as all Operation are completed we Free memory with BIO_free_all to prevent any memory leak
Now that we are done with Key generation , let's combine the code
void RequestInitlizer(SOCKET Accesptor) {
  char Buffer[1024];
  std::string request;
  int bytesRead;
  do {
    bytesRead = recv(Accesptor, Buffer, sizeof(Buffer), 0);
    if (bytesRead > 0) {
      request.append(Buffer, bytesRead);
      if (request.find("Sec-WebSocket-Key: ") != std::string::npos &&
          request.find("Sec-WebSocket-Version:") != std::string::npos) {
        std::string keyHeader = "Sec-WebSocket-Key: ";
        const char* keyStart = strstr(Buffer, keyHeader.c_str());
        if (keyStart) {
          keyStart += keyHeader.length();
          const char* keyEnd = strchr(keyStart, '\r');
          if (keyEnd) {
            std::string key(keyStart, keyEnd);
            std::string ACCEPT_KEY = generateWebSocketAccept(key);
            std::string RESPONSE_HEADER =
                "HTTP/1.1 101 Switching Protocols\r\n"
                "Upgrade: websocket \r\n"
                "Connection: Upgrade\r\n"
                "Sec-WebSocket-Accept: " +
                ACCEPT_KEY + "\r\n\r\n";
            const char* Bufff = RESPONSE_HEADER.c_str();
            int bytesSent = send(Accesptor, Bufff, strlen(Bufff), 0);
            if (bytesSent == SOCKET_ERROR) {
              std::cout << "Failed to send response. Error code: "
                        << WSAGetLastError() << std::endl;
            }else {
              std::cout << "Connection Established";
            }
          }
        }
      }
      request.clear();
    }
  } while (bytesRead > 0)
}
}
Let's Continue from Line 19 , we use our previosly defined function to get the base64 encoded value and store it in variable Accept Key . We then generated a Header Response for a HTTP Request which sends back a Response 101 Switching Procotol and Sec-WebSocket-Accept as the key which we generated
we use send function to send back to socket connection , Send Takes 3 parameters
- socket -> socket to Write Data into
- buffer -> Points to the buffer containing the message to send.
- length -> Specifies the length of the message in bytes.
- flags -> Specifies the type of message transmission , 0 means no flags are specified
With Everything Done , Let's Compile and run the program to test if client is able to establish connect to server
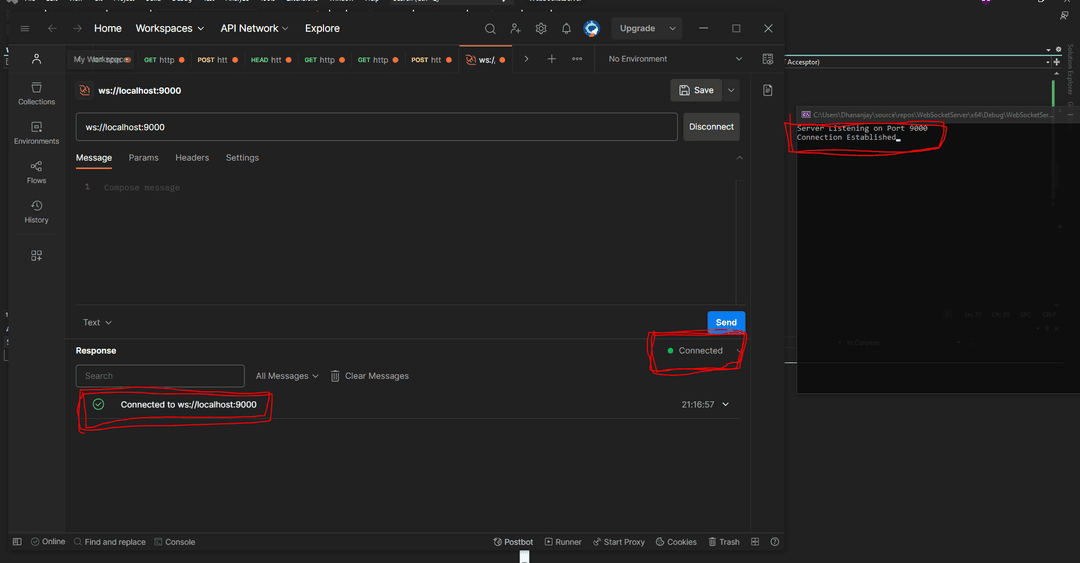
Reading Data From Clients
Now That we are successfull is Establishing Connection let's try to read data from client
Reading Data from Client is Not a Easy Task , since Clients Sends a Encrypted Data and Server Have to Decode it , Let's Understand How in encoded form looks like
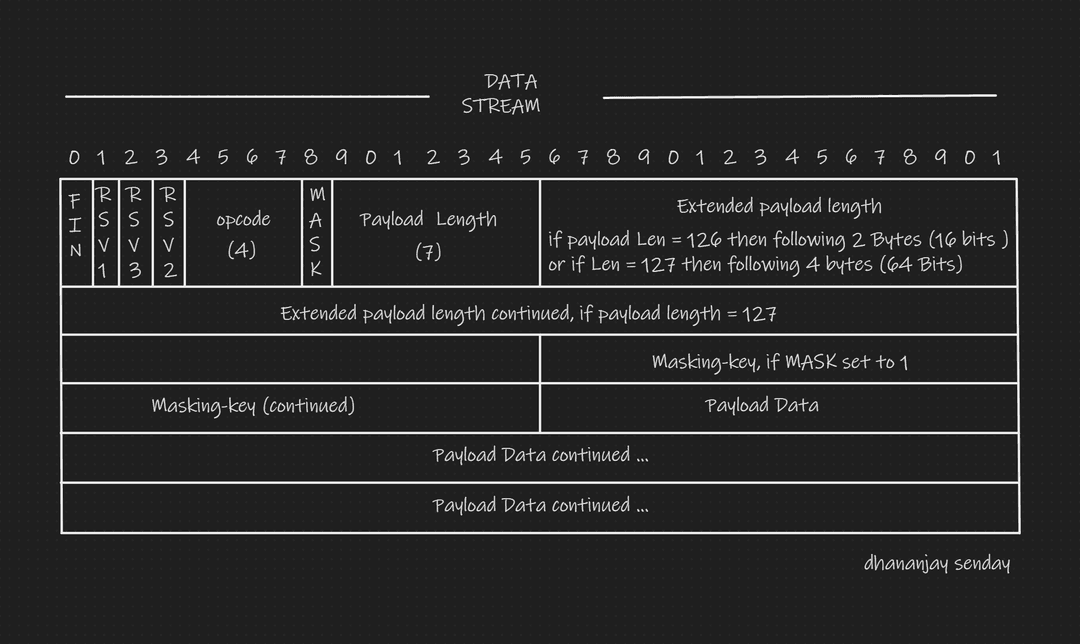
This might look scary at first BUT believe me this isn't , Let me Break down for easier understanding . Before I start explaining the diagram I want the readers to keep two things in mind
- 1 Byte = 8 Bits
- 1 Bit can only represent One or Zero i.e Binary
So Let"s Starts
- As The Data Arives , it The First , 0th bit tells us Whether the incoming message is final fragment , final fragment means it"s the Only Message Chunk as message can be splitted if the payload/message is way too large
- 1st , 2nd , 3rd bits is not much of used and should always be Zero
- Opcode or 4 5 6 7 bits depicts the type of Incoming Message . There can be varios types of Opcode but for simplicicity for this blog , we will consider just one which is used for text only field i.e x1 Hexadecimal or 0000_0000_0000_0001 in binary
- 8th bit classify weather the incoming messaged in encrypted Masked
- Then we have payload length , Here Payload Lenght is size of our message , if payload length is between range0-125 then bits from 9 to 5 are actual message length but if the payload length is 126 the following 2 Bytes are actual length or if the payload length is 127 then the following 4 Bytes are actual length
- Masking Key , the bits of length 32 or 4 Bytes stores the Masking Key which is the actual encryption key used to decode the message payload
- Finally we have to Payload Data
Let's Starts with decoding Function as we refactor the code RequestInitlizer function . We Will Store the message in Char as size of Char is 1 Byte hence it makes our work easier to get binary encoded values
void RequestInitlizer(SOCKET Accesptor) {
  boolean isOldConnection = false;
  char Buffer[1024];
  std::string request;
  int bytesRead;
  do {
    bytesRead = recv(Accesptor, Buffer, sizeof(Buffer), 0);
    if (bytesRead > 0) {
      if (isOldConnection == false) {
        std::cout << "New Connection Created" << std::endl;
        request.append(Buffer, bytesRead);
        // Rest of Code .....

        if (bytesSent == SOCKET_ERROR) {
          std::cout << "Failed to send response. Error code: " << WSAGetLastError() << std::endl;
        } else {
          std::cout << "Connection Established";
          isOldConnection = true;
        }
      }
    }
  }
  request.clear();
}
else {
  // Recieved Old Connection Request
  std::cout << "Old Connection Reused" << std::endl;
}
}

}
while (bytesRead > 0);
}
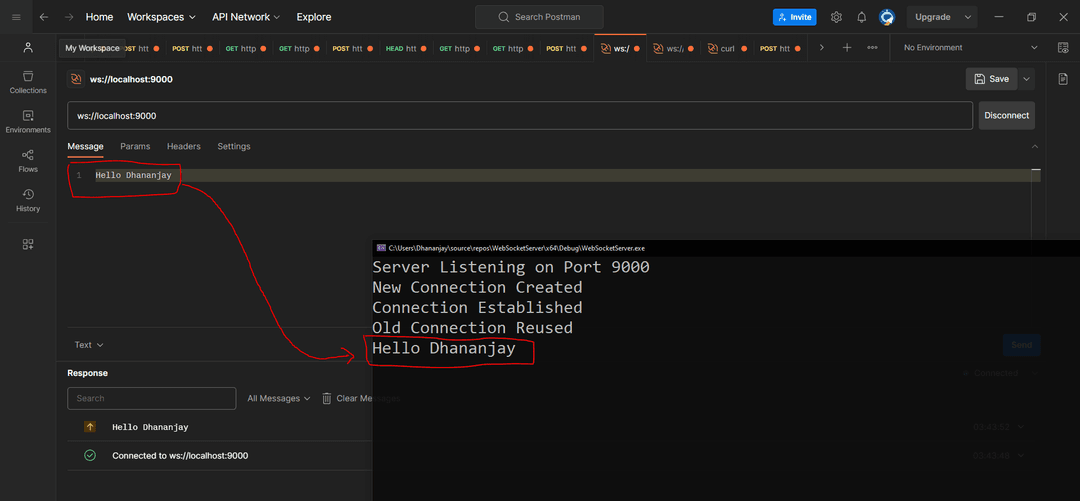
Notice the Changes done in line number 3 ,10 and 26 . Before understanding let's understand the nature of socket file descriptor incase you are unaware of . Sockets are alive as long as the remote connection hasn't been killed that means , everytime Accept Calls , a New Socket Connection is instantiated with TCP Connection and keep alive , when will be reused by the connection for any future purpose . This is what we are trying to make use of .
The First Request of Web Socket Connection will always be for Handshake hence we are keeping track using a isOldConnection boolean if the isOldconnection is true , we will not go for web socket handshake instead use it to read data from data frame
// rest of code ......
        isConneted = true;
      }
    }
  }
}
request.clear();
}
    else {
      std::cout << "Old Connection Reused" << std::endl;
      int index = 0;
      unsigned char firstByte = Buffer[index++];
      unsigned char secondByte = Buffer[index++];
      bool fin = (firstByte & 0x80) != 0;
      int opcode = firstByte & 0x0F;

      bool masked = (secondByte & 0x80) != 0;
      int payloadLength = secondByte & 0x7F;
      if (payloadLength == 126) {
          payloadLength = (Buffer[index++] << 8) | Buffer[index++];
      }
      else if (payloadLength == 127) {
          payloadLength = (Buffer[index++] << 24) | (Buffer[index++] << 16) |
              (Buffer[index++] << 8) | Buffer[index++];
      }

      std::vector<unsigned char> maskingKey;
      if (masked) {
          maskingKey.push_back(Buffer[index++]);
          maskingKey.push_back(Buffer[index++]);
          maskingKey.push_back(Buffer[index++]);
          maskingKey.push_back(Buffer[index++]);
      }

      std::vector<unsigned char> payloadData;
      for (int i = 0; i < payloadLength; ++i) {
          unsigned char decodedByte = Buffer[index++];
          if (masked) {
              decodedByte ^= maskingKey[i % 4];  // Apply the masking key
          }
          payloadData.push_back(decodedByte);
      }

      for (const auto& byte : payloadData) {
          std::cout << byte;
      }
    }
  }


} while (bytesRead > 0);
Let's Work out on Code Together
- The Code will only be executed if it is Old Connection which means Handshake is Already Completed
- We Will Use Char as Buffer since Char is 1 Bytes hence accessing 1 Char from Buffer Size is Equivalent to Accessing 8 bits , index is used as a counter
- From Our Previos Reading , we Know 1st 8 Bits contains FIN + RSV + OPCODE
- We are extracting First Bytes with index 0
- Let's Determine FIN from firstByte using Bits Operationthis exact step is performed in Line Number 15
 We Use Binary Operation Capability of C++ to find the MSB
 - Similary To Get Op Code , we would have to remove FIN and RSV from 8 bits , to achieve this we will perform binary multiplication of value with 0b00001111 , This Step is SHow in Line Number 18
- Now Let's retrive value for masked Value , we would get the 1st bit of second byte , which we can obtain from binary multiplication with 0b10000000
- Let's Get the payload Length Now , we would perform binary operation of secondByte with 0b01111111 (0x7F) shown in line number 19
- As Per RFC , we will check under which range payload length fall under , if the paylaod length is less then 126 , the value is same as the value or if it is 126 , the payload lenght would be following 2 and following 4 bytes if the length is 127 . The Bitwise Operation might be confusing let me break it down
 Line 20-Line 26 Summarise
 - we will now store the next 4 Bytes as mask key
- As we are done with lengthy stuffs decryption is quite easier . All we have to do is Iterate Over Message Size and perform XOR operation with payload data and store it in vector payloadData;
Huh That was quite of Stuffs to learn , Let's now Test the code to see if our program actually reads the message sent from Server or not
Sending Data to Client
Well Believe me Sending Data from Server to Client isn't that hard !!! . Let's Keep it simple , if client sends a PING , we would simple reply back with a PONG
//REST OF CODE.....

        std::vector < unsigned char > maskingKey;
        if (masked) {
          maskingKey.push_back(Buffer[index++]);
          maskingKey.push_back(Buffer[index++]);
          maskingKey.push_back(Buffer[index++]);
          maskingKey.push_back(Buffer[index++]);
        }

        std::vector < unsigned char > payloadData;
        for (int i = 0; i < payloadLength; ++i) {
          unsigned char decodedByte = Buffer[index++];
          if (masked) {
            decodedByte ^= maskingKey[i % 4]; // Apply the masking key
          }
          payloadData.push_back(decodedByte);
        }
        std::string ReceivedMessage(payloadData.begin(), payloadData.end());
        std::cout << ReceivedMessage << std::endl;
        if (ReceivedMessage == "PING") {
          std::cout << "PONG!! from server";
          std::string SendResponse = "PONG";
          unsigned char header[10];
          header[0] = 0x81;
          size_t messageLength = SendResponse.length();
          if (messageLength <= 125) {
            header[1] = static_cast < unsigned char > (messageLength);
          } else if (messageLength <= 65535) {
            header[1] = 126;
            header[2] = static_cast < unsigned char > ((messageLength >> 8) & 0xFF);
            header[3] = static_cast < unsigned char > (messageLength & 0xFF);
          } else {
            std::cout << "Message length exceeds the supported limit." << std::endl;
            return;
          }
          int bytesSent = send(Accesptor, reinterpret_cast <
            const char * > (header), (header[1] <= 125 ? 2 : 4), 0);
          if (bytesSent == SOCKET_ERROR) {
            std::cout << "Failed to send WebSocket frame header." << std::endl;
            return;
          }
          bytesSent = send(Accesptor, SendResponse.c_str(), messageLength, 0);
          if (bytesSent == SOCKET_ERROR) {
            std::cout << "Failed to send WebSocket message payload." << std::endl;
            return;
          }
          std::cout << "WebSocket message sent successfully." << std::endl;
        }

      }
    }
  } while (bytesRead > 0);
}
If you were able to understand payload Reading part fully then sending should be as easy as piece of cake , so let's use our understanding from client to server message breakdown the procedure
- We are strong Message into a String variable ReceivedMessage in line number 20
- we then compare if the incomign data is equal to PING
- We then prepare a header to send to client , the header would contain , FIN , MASK , RSV and Payload length
- As per our knowledge , 1st Byte of Header always contain FIN + RSV + Message type , Fin would be 1 as it's the only Message fragment , RSC would be 000 and Mesage type will be Text 0001 so 1st Byte will hold the value 0b10000001 or 0x81 as shown in Line number 26
- We then Store the Message Size into next Buffer Storage
- As You might have already guessed , No Server Doesn't needs to send masked Data to Client , Hence we can directly send the Header Now
- Line 38 , we are send the response back into same socket connection we accepted earlier for reading
- The Send Connection Takes the Header and we determine the size of header in (bytes) , here if size of response exceeds 125 then send 4 or send 2 bytes
- After we send the Header and can now send the Actual Data to Client
- we use the same send function to send data , but this time , the send would take Array hence we breakdown the strea into c buffer using c_str and send the response
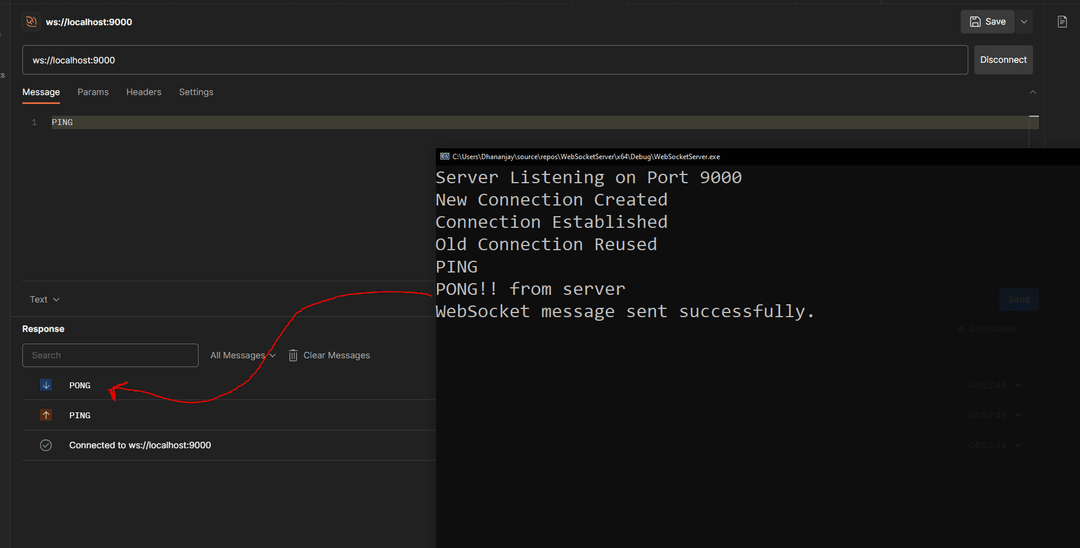
And Finally the server reply back with response
Conclusion
And we are done !!!! Well If you are still reading the blog , Thankyou for sticking through , This was my First Blog , I will keep improving my blog , incase you have something to share please email me at [email protected]
Do you have any queries? If so, feel free to comment below